Wednesday, April 29, 2009

An Imperfect Recipe?


Today, I am presenting a recipe that seems to be rather flawed. However, it is so delicious that I feel it deserves some mention. My original intention was to make this . I have been reading a lot of Orangette. The writing is just so good, and the stories are really entertaining. The recipes that are featured really appeal to me. I especially liked the idea of a rich chocolate cake like this one, but then I came across a similar recipe in one of my cookbooks. This second recipe uses fewer eggs and less sugar, so I figured it would be less filling, but it would taste richer.
As the cake came out of the oven, it smelled delicious. However, it looked a little dry. When it came time to serve dessert, the cake proved to be dryer than I would have liked, though there were pockets of moist (how I hate that word), rich cake. It was really similar in texture to a brownie, but the flavor was more sophisticated than most brownies I have tasted. While it crumbled apart and was impossible to eat with anything but a spoon, it was undeniably delicious.
My belief is that the temperature of my oven is off, and the delicate nature of this cake could not properly endure the extra heat. As a result,the cake was slightly overcooked. I intend to buy an oven thermometer to prevent future problems like this one.
At some point, I would like to try this cake again, in order to perfect the texture. If this doesn't work, then I will turn to the Orangette recipe above. The extra eggs should prevent dryness in this type of cake. And so, though I have ideas on how to fix this problem (and it really is worth it!), the cost of ingredients and the calories of the recipe discourage me from remaking it right away. When I do, however, I promise to tell you about it. Does anyone else have thoughts on how the cake could be less crumbly?
I have reprinted the original recipe below.

Charlie's Afternoon Chocolate Cake
reprinted from Chocolate Ephiphany by Francois Payard.

Ingredients:
Vegetable cooking spray, for the pan
All-purpose flour, for the pan
10 tablespoons unsalted butter
8 oz. (usually two bakers' chocolate bars) 60% chocolate, chopped
2 large eggs
2/3 cup of sugar
3/4 cup all purpose flour

Place a rack in the center of the oven and preheat the oven to 350 degrees. Spray the sides and bottom of a round 9-inch cake pan with cooking spray. Dust with flour, shaking off the excess, and set aside.
Bring the butter to a boil in a medium saucepan over medium-high heat. Stir to prevent from burning. Remove from the heat and add the chocolate to the pan. Stir the mixture until the chocolate is melted and smooth
Whisk together the eggs and sugar in a large bowl, until well-combined. Add the flour and mix well. Add the chocolate to the batter and stir until the mixture is just combined. Pour the batter into the prepared cake pan.
Bake for 15 minutes, then lower the heat to 300 degrees and bake for an additional eight minutes. Remove the cake from the oven and allow it to cool completely in the pan. Unmold, and serve.

Makes one 9 inch cake; serves eight to ten.
Serve with whipped cream, ice cream, or powdered sugar, if desired. This cake freezes well.

Tuesday, April 28, 2009

An Old Favorite

With the coming of warmer weather and brighter days, I have found myself waking up earlier on weekends than I have over the winter. There is something about beautiful weather that makes me not want to miss any of it. Because of this, my weekends feel longer and fuller. Though I am not really a morning person, I have to admit that it's been nice. This past Sunday was one of those early days. Since the day wasn't hot yet (the temperature would creep up to 80), I turned on the oven and made Scottish scones for breakfast.


I have been making these scones since I was in high school. They are as simple to make as they are tasty. My sister, Rachel, originally tried the recipe from my mother's copy of the Pillsbury Baking Cookbook. I believe most of the recipes were chosen in various Pillsbury baking contests over the years, so I can honestly say that the recipes in this book were all winners. I've tweaked the recipe just a tiny bit to make it reflect the way my family and I have come to make the scones over time.

The end result are scones that can be eaten for a delicious breakfast, brunch or snack. The texture is at once soft and crumbly. The flavor is sweet, but not overly so, and there is no need for butter or jam. The scones aren't exactly nutritious, but using whole wheat flour and the oatmeal would make them acceptable for a breakfast-time treat.


Scottish Scones

Adapted from the Pillsbury Cookbook

Scones:

1 ½ cups all purpose flour

¾ cup "quick cooking" oats (Quaker Oats or something else that you would use for oatmeal)

¼ cup firmly packed brown sugar

2 tsp baking powder

½ tsp salt

½ tsp cinnamon

½ cup butter

½ cup milk

Topping:

1 tbl butter, melted

1 tbl sugar

¼ tsp cinnamon

Heat oven to 375. Line a baking sheet with parchment paper. In a medium bowl, combine flour, oats, brown sugar, baking powder, salt, and ½ tsp cinnamon. Blend well. Using pastry blender or fork, cut in ½ cup butter, until mix is crumbly. Add milk all at once, stirring just until moistened. On a well-floured surface, gently knead dough five or six times, or enough to work the dough into a ball.

Placed on baking sheet; press into six inch circle, about one in thick. Brush top with melted butter. In small bowl, combine sugar and ¼ tsp cinnamon. Sprinkle over the top. Cut dough into eight wedges. Separate slightly. Bake at 375 for 20 minutes, or until golden brown. Serve warm.

Makes eight scones.


Monday, April 27, 2009

Found Online


If you would like to mark the occassion of the Kentucky Derby, or are just looking for an excuse to throw a party, take a look at the the blog Hostess with the Mostess. I especially like the idea for mint julep cupcakes
!

Summer in a Glass


This weekend brought the first spell of summery weather. While a bit unseasonable, the sunshine was a welcome change in Pittsburgh. Friday was so beautiful that I made lemonade as soon as I got home from work. I used this recipe from Orangette. On Friday, I added two cups of vodka to the pitcher for a weekend refreshment. I then made a just-lemonade version on Sunday.


Basil Lemonade

Adapted from Orangette, July 2007 and Gourmet, July 2007

While it might seem rather labor-intensive for a drink, the combination of fresh-squeezed lemons and homemade simple syrup is refreshing and delicious. It also uses less sugar than store-bought lemonade. You can also add basil, mint, rosemary or culinary lavender to make this drink even more special. For my first batch, I infused the simple syrup with basil. I thought it was refreshing, but Sean thought it tasted weird. It's really a matter of individual taste. If you were making lemonade for a large group of a party, you could make simple syrup with different flavors and mix with the lemon juice in smaller pitchers, a cocktail shaker,or individual glasses, so each person could find a flavor they liked.


2 cups Basil Lemon Syrup (see below)
2 cups cold water (tap or bottled)
2 cups ice cubes
2 cups vodka from the freezer (optional)
1 ¼ cups fresh lemon juice (about five lemons)

Juice the lemons into a large Pyrex measuring cup. Strain through a sieve into a pitcher. Add the ice, then the water, vodka (if using), and simple syrup.
Stir together all ingredients; then pour into tall glasses half-filled with ice.

Yield: about 6-8 cups

Basil-Lemon Syrup
2 cups water
1 cup granulated sugar
4 (4- by 1-inch) strips lemon zest
2 cups packed fresh basil sprigs

In a medium saucepan, combine the water, sugar, and zest. Bring to a boil over medium-high heat, stirring until the sugar is dissolved. Remove from the heat, add the basil, stir to combine, and let stand at room temperature, covered, for 1 hour. Transfer the mixture to a medium bowl and chill until cold, about 1 hour. Strain the syrup through a sieve into an airtight container, pressing hard on and then discarding the solids.

Note: The syrup will keep, covered and chilled, for up to five days. The recipe can also be easily doubled.

Yield: about 2 ½ cups

*picture from Botanical.com

Thursday, April 23, 2009

After the Feast


Now that we have learned the proper way to make bread (thanks, Gallant!) I thought I would quickly address a method for saving this delicious creation when it is past its prime (if there is any left, of course). One way that I like to prevent the waste of stale bread is to make croutons. This is not an ingenious idea, I know, but it is a very simple process, and making your own is a great way to control sodium and trans-fat intake. The entire process should not take more than thirty minutes, if that.
It is so simple, in fact, that I don't even feel the need to write a recipe. The seasonings are up to you and what is on hand at the moment.
After preheating the oven to 350 F, I start by taking some good but stale bread, enough for at least five good-sized slices. I then cut them up into large crouton squares. I do not worry about continuity. I then toss the squares with some extra-virgin olive oil and other herbs and spices, such as pepper, garlic salt, herbes de provence, oregano, or grill seasoning. Flavored olive oil is also nice, if you have some.
I then cook the croutons in the oven for about fifteen minutes, or until brown. I let the finished croutons cool, and then I store them in an airtight container.

Tuesday, April 21, 2009

Goofus and Gallant Make Bread


When Goofus sets out to make bread he follows Mama’s recipe carefully except that he makes it his singular goal to see how much flour he can force into the dough. He presses hard when he kneads and keeps forcing more and more flour in until the dough ball becomes dry and rough. If he could, Goofus would pack an entire 5 pound bag of flour into a single ball of dough. When he finishes his kneading, he holds his newly formed, white cannonball in his hand and silently debates whether it would be more fun to lob it at Gallant’s head now or after it is baked.

Gallant, of course, takes a very different approach. He starts by going through a full surgical scrub. After treating all work surfaces with Lysolä Brand disinfectant, he carefully mixes all of the ingredients from Mama’s recipe in a large bowl. He stirs in just enough flour to form a moist ball that begins to pull away from the sides of the bowl. After donning his surgical mask he spreads about ½ cup of flour on his kneading board. He keeps another cup of flour close at hand because he knows he’ll be “kneading it” later. He lovingly lifts his dough ball from the bowl and places it onto the floured board. He begins the process of lightly pressing and gently folding the dough over and over. He allows the flour on the board to take away that excessive stickiness that Gallant finds so distressing. If the dough ball again begins to feel too sticky before the kneading is complete, Gallant sprinkles a little more flour on the board from the “emergency cup” he has standing nearby.

Gradually the gooey mass begins to take form. Instead of a mix of ingredients, it develops into an entity. It acquires a soft, airy, beautiful character that feels almost silky to Gallant’s fingers. At this point Gallant loves to poke at it gently with his index finger and watch the indentation spring back ever so slowly. Then he is ready to allow his new creation its time to rise, knowing that it will soon be ready for the ultimate glory of baking. He can already imagine the aroma and the transformation to a true loaf of bread!

Gallant steps back to admire this growing, almost breathing form. He can’t help but drift into peaceful contemplation. He knows that this very process has nourished mankind since time immemorial. This thought takes him so deeply into meditation that he fails to notice a large, white, airborne mass rapidly approaching his head.

Monday, April 20, 2009

Seasonal Delights


I am now going to report about Sunday, which was a much more successful day for cooking.

I started by preparing a light lunch for myself. This is a difficult time of year, in terms of produce. Tomatoes are mealy in texture and tasteless. Bell peppers are rotten and ugly, and broccoli is no longer a good choice. This leaves asparagus, new potatoes and artichokes.

While I love artichokes, I really have no desire to extract the tender hearts from their pointy exteriors. One way that I have found to get fresh artichokes without any of the work is by purchasing artichokes from the olive bar at the local grocery store. The ones that I brought home are called roman artichokes. These already have a lot of flavoring.

A recipe that I like to use for artichokes is based on a recipe from Giada DeLaurentiis . However, on Sunday, I made a smaller version using ingredients that were available to me at the time.

This is a really tangy, flavorful dish. There is also a nice hint of spice. Eating with bread or crackers balances the flavors. Still, a little goes a long way.

Artichoke Gratin
(based on a recipe by Giada DeLaurentiis)

* 3 tablespoons butter, plus more for topping the breadcrumbs (optional)
* 1 garlic clove, minced
* 1/4 pound roman artichokes, chopped
* salt and freshly ground black pepper, to taste (if using cooking wine, use less salt)
* pinch red pepper flakes
* 1/4 cup chicken broth
* 1/8 cup Marsala wine or sherry
* 1/4 cup plain bread crumbs
* 1/4 cup grated Romano or similar cheese

Directions

Preheat the oven to 450 degrees F.

Melt two tablespoons of butter in a skillet over medium heat. Add the garlic and cook for 1 minute. Add the artichoke hearts, salt, pepper, and red pepper flakes and cook until the artichokes are starting to brown at the edges, about 3 minutes. Add the chicken broth and wine and simmer for 3 minutes. Transfer the artichoke mixture to a small baking dish or gratin dish.

Melt one tablespoon of butter in the same skillet used to cook the artichokes. Remove from heat. In a small bowl, mix the melted butter with the bread crumbs. Stir in the Parmesan and top the artichokes with the bread crumbs. Dot the top with pieces of the remaining butter, if desired. Bake until the top is golden, about 5 minutes. Serve with fresh bread or crackers.
Serves two as a side-dish or light meal.


Part II
______________________________________


My other project for Sunday was a lemon-yogurt cake. I got the idea for such a cake on Friday, while perusing Orangette. I remembered a very similar recipe from Ina Garten's Barefoot Contessa at Home. I chose the second version because I don't actually own the right type of cake pans at the moment, though I do have loaf pans.
The result of this recipe is a luscious, bright-tasting dessert. My cake was rather soft in the middle, so I would like to try the making the cake as a sort of hybrid the of the loaf version and the round cake. One detail that I really like about Ina Garten's version is the lemon juice and sugar mixture that you pour onto the cake ten minutes after taking the cake from the oven. It adds an extra layer of sweetness and tart lemon flavor.

Lemon Yogurt Cake
Reproduced, with my own notations, from Barefoot Contessa at Home by Ina Garten. Clarkson/Potter Publishers, 2006.
This recipe is a variation of a recipe by Dorie Greenspan. A berry sorbet or ice cream would complement this delicious, easy-to-prepare cake very nicely.

*1 1/2 cups all purpose flour
* 2 teaspoons baking powder
* 1/2 teaspoon kosher salt
* 1 cup plain whole milk yogurt
*1 1/3 cups sugar, divided
* 3 large eggs (Ina Garten calls for extra-large, but this is optional)
* zest of two lemons (about two teaspoons)
*1/2 teaspoon vanilla extract
* 1/2 cup vegetable oil
*1/3 freshly squeezed lemon juice

For the glaze:
* 1 cup confectioners' sugar
* 2 tablespoons freshly squeezed lemon juice (will turn out to be about 1 1/2 lemons)


Preheat the oven to 350 degrees Fahrenheit. Grease an 8 1/2 X 4 1/4 X 2 1/2 inch loaf pan. Line the bottom with parchment paper. Grease and flour the pan (I used Pam with flour).
Sift together the flour, baking powder, and salt into one small or medium-sized bowl. In another (larger) bowl,whisk together the yogurt, 1 cup of sugar, the eggs, lemon zest, and vanilla. Slowly whisk the dry ingredients into the wet ingredients. With a rubber spatula, fold the vegetable oil into the batter, making sure it's all incorporated.


Pour the batter into the prepared pan and bake for about 50 minutes, or until a cake tester place in the center of the loaf comes out clean.

Meanwhile, cook the 1/3 cup of lemon juice (strain the juice to remove any seeds) and remaining 1/3 cup of sugar in a small pan until the sugar dissolves and the mixture is clear. Remove from heat; set aside.

When the cake is removed from the oven, allow it to cool in the pan for 10 minutes. Carefully place on a baking rack over a sheet pan. While the cake is still warm, pour the lemon-sugar mixture over the cake and allow it to soak in. Cool.

For the glaze, combine the confectioner's sugar and lemon juice and pour over the cake.

Makes one loaf.

Sunday, April 19, 2009

Kitchen Mishaps


I have had a busy weekend in the kitchen! Saturday delivered results that were so-so. It started with me making french toast from a recipe that I found on Orangette. However, I found myself short on some of the called-for ingredients, so I will reproduce what I did here:


Challah French Toast
(adapted from Molly Wizenberg)

1 cup 2% milk
4 large eggs
2 Tbs sugar
1 Tbs. brown sugar (use this brown sugar and the extra tablespoon of sugar if no vanilla is available to you--I would much rather use vanilla, though)
¼ tsp salt
cooking spray
6 slices challah, about ¾ inch thick
Powdered Sugar


Whisk together the first five ingredients in a wide, shallow bowl.

Place a large skillet, preferably cast-iron (I have a cast-iron grill pan, so that's what I used), over low to medium heat, and add enough cooking spray to cover the bottom of the skillet. You will probably need to go through this process several times.

Two at a time, add the bread slices to the egg mixture in the bowl, allowing them to rest for a minute on each side. They should feel heavy and thoroughly saturated, but they should not be falling apart (Optional: allow the slices to rest for a minute on a plate. This will allow the bread to absorb the egg mixture. However, if you don't like your french toast to be very eggy inside, skip this step). When the oil is hot, place the slices in the skillet. Cook until the underside of each slice is golden brown, about 2 minutes. Turn the bread, and cook until the second side is golden, another 2 minutes or so. Remove the bread from the skillet to a plate lined with a paper towel, allow to rest for 30 seconds or so.
When the heat is off, place the slices back onto the cast-iron skillet. This will allow the outsides to crisp up a bit without burning. Serve immediately with powdered sugar or other toppings of your choice.

Yield: 6 slices, serving 2 or 3.

The french toast turned out pretty well. However, if you are using a cast-iron pan, I do not recommend using a grill pan, as it can leave a charred flavor to it. I plan to try the recipe again, using a different pan. I also recommend the second crisping stage to prevent the outside from being too soft. I used this technique on my last three pieces, and it really improved the results. The other pieces were far too soggy.

In the afternoon, I attempted to make the pizza dough that I had promised two weeks ago. I followed this recipe for the dough, planning to split up the dough into six individual crusts and freeze them.
The initial mixing stage turned out well; it was really easy and the mixture smelled good. I used yeast from a jar instead of packets, so that is one level tablespoon per yeast packet called for.


Greenhorn that I am, I took Chef Oliver's advice and made a well of flour and other dry ingredients directly on my counter top.


Few home kitchens really have the space for this type of process, as I learned the second I poured the yeast mixture into the well. Yeast-water ran everywhere, threatening the life of my precious computer that sat on the stool next to me. It also nearly ran off the ledge, and into the adjacent living room (I know, it was stupid of me to choose this particular surface. Really stupid. But it offered the most space). As you can imagine, there was no time for me to photograph this disaster, so you will just have to use your imagination. Allow me to have made this mistake for you,readers. Do not try the straight-on-counter-top well technique!
After cleaning up the mess and kneading the dough, I was left with a dough that was crumbly and dry. Not being sure what to do, I called my dad, who enjoys making his own pizza dough and breads. He has been doing this type of thing for about ten years, I believe, so he is certainly the person to ask. You might ask, "why didn't you go to him for advice before?" Because I don't always like to admit that father often does know best. At least, mine does. Sometimes I like to try my own thing.
He recommended to me that I add some extra water from the faucet, not very cold, but not hot, either. Adding some extra flour, I should knead the dough until it gets soft, and then place in a bowl and cover with a towel. I then should let it sit for an hour or so. If the dough fails to rise, it is ruined. He also mentioned that perhaps I should purchase a bowl large enough to mix dough ingredients together, and abandon the counter-top method. I directly purchased said bowl.
In the end, my dough did rise, fortunately. I tried to knead the dough as little as possible, so it wouldn't become tough. I then froze the result in smaller balls, as planned. Because the dough is very floury, I covered the dough balls with plastic wrap and placed them in individual zip-lock bags. When I use the dough to make pizza, I will let you know how it turns out.
One exciting thing that came out of this experience is that my dad will be guest posting on Sugar & Spice to talk more about the proper way for home cooks to make pizza dough!
Sunday has been far more successful in terms of my food preparation (weather-wise, it has been rainy, but it is April, after all). I will look forward all day to posting about this tomorrow!

Friday, April 17, 2009

The Feast


As promised, I am here to report on Easter dinner. Easter is one of my favorite holidays, because it is food and family (or friend) based, without much blatant commercialism and feelings of obligation. Thanksgiving is more food oriented, of course, but there is some dictation on what you will make, if you are something of a traditionalist, like me.

There is just so much more room for creativity on Easter. Sean and I went to my sister's house, where we feasted on red snapper, potatoes and asparagus. I made an appetizer of goat cheese truffles, which I found here on the lovely blog Chocolate and Zucchini.

Per Clotilde's suggestions, I used herbes de provence, fresh chives, fresh basil, chopped hazelnuts, and toasted sesame seeds. I also used a lemon-pepper flavored garlic salt that Sean found in the spice section of the local Giant Eagle (the major grocery store chain in Pittsburgh). These selections were all delicious, and I was able to mix and match. Personally, I found the herbes de provence a little too dry, but my brother-in-law liked it.

I also tried the paprika suggestion. My initial plan was to just use paprika, with nothing to cut the intensity of the flavor. There are some paprika covered truffles in Clotilde's picture, and they looked really nice, and added great color to the plate.

I after I had rolled my first paprika truffle, I began to have doubts. I don't even really like paprika! I tasted it, and it was very strong. It was so strong, in fact, that a chocolate-covered pretzel that I ate about ten minutes later tasted of paprika. So, I don't really recommend the paprika, unless you mixed it with something else, or you really, really like paprika.

Served with fresh bread and sesame wheat crackers, the truffles were a great success. But, in my opinion, the real show-stopper of the evening was the dessert that my sister, Rachel, prepared.

It was not the lemon tiramisu that I had thought she was going to serve, but an Italian lemon and nut cake from Vegetarian Times. Sean described it as a "soft biscotti." With fresh citrus flavor and an agreeable crunchiness, this is a satisfying, but light, dessert that makes a great end for a large meal.

Now that it's the end of a very long week, I am looking forward to a relaxing weekend of being outside and baking. It may be too ambitious, but there will be some baking and breakfast making in the lineup. Hopefully, at least one of my attempts will be something worth sharing with you!

**Photo credit to thedailygreen.com

Saturday, April 11, 2009

Bread is the King of the Table...


...and all else is the court that merely surrounds the king.
Louis Bromfield, American novelist (1896-1956)

I have not made the aforementioned chicken and dumplings yet; Thursday was just too nice, weather-wise, and I wouldn't have been able to eat meat yesterday. I am planning on making it soon, however. Maybe this week.
I haven't really been doing much cooking at all, I must admit. Tacos, burritos, sandwiches during happy hour, and some pizza have been my staples of late (I did, however, make the eggs in the photo above. I was breaking in a new pan. Judging by the shape of the eggs, it looks as though more breaking in will follow).
I think most of us fall into this kind of cooking rut, and I have a feeling that I will begin cooking again when I check my bank statement, or am unable to button my pants.
That's not to say that I haven't been thinking about preparing food for myself. I have! With Easter coming up, I can say that I have been busy purchasing food and thinking about what I will make. We are going to my sister's house tomorrow; she will be making most of the food, and I am bringing an appetizer and the wine. I will report more on that later.
I also made an excursion of sorts today. I wanted to try a bakery that I recently heard about: Jean-Marc Chatellier's French Bakery, in the Millvale area of Pittsburgh. I arrived at 1:30, and the bakery closes at 2:00 on Saturdays, so a lot of the delicacies that I imagine must have been there earlier were already sold off. However, there were plenty of luscious looking cakes and various kinds of rolls. If my sister were not making her delicious lemon tiramisu for tomorrow, I would have certainly left with one of these cakes. The pictures on the website don't do them justice.
I was at the bakery for bread, but there was none left. I justified my trip with ordering 2 croissants and one plain and one sweet brioche. I have already broken into the plain brioche roll, and I am quite pleased. Below are some pictures of my spoils.


I think another trip to Millvale will be in order. I want a black forest cake for my birthday!

Wednesday, April 8, 2009

The Ghost of Pizzas Past


On Sunday, Sean and I made pizza. I had wanted to make the dough from scratch, but I ran out of time. This was a mistake. Since I wanted the crust to taste freshly baked, I didn't buy a Boboli shell, the way I have before. They are rather chewy in texture. This time, I tried Pillsbury pizza crust.
The end result tasted, well, like a Pillsbury roll, and the edges on the bottom turned out black. Fortunately, our choice of toppings saved the pizza.
At my request, we used a mix of cheeses; fontina, romano and mozzarella. Sean suggested using bacon and onion, and I insisted on adding green peppers. We finely chopped the pepper and onions, so that the water coming from them wouldn't make the pizza soggy. We also used some Italian-herb flavored olive oil directly on the crust. For sauce, we added just a minimal amount of Classico Creations Fire Roasted Tomato and Garlic sauce. It was all very tasty! However, I think that time has come for me to grow up, get off the couch, and start making my own pizza dough!
While researching the best recipe for my needs ( I don't own a mixer, so I shy from things that involve the use of one--sad, I know), I realized that I could freeze the dough, and then we could have pizza even more!
I am planning on making this recipe in the very near future. I will be sure to report on how this goes. If I am successful, then the next step will be working on making my own sauce. However, there are plenty of great marinara/ pizza sauce options, so I am in no hurry for that.
Tomorrow, provided that it is still unseasonably chilly outside--a low of nineteen degrees and snow yesterday! I am planning on making some delicious (and simple!) chicken and dumplings! It's perfect for some cozy comfort food.

Saturday, April 4, 2009

Nice Spice


On Thursday, as mentioned, I made a Chicken Satay Stir Fry. Click here for the recipe. For extra spice, I added a spoonful of red curry paste and a little Sriracha (the hot, spicy, rooster sauce in the big red bottle at Asian restaurants).

Otherwise, I think that the Satay sauce is a little bland. I would, however, recommend tasting the sauce to adjust the flavors to your liking.
Since I used chunky peanut butter, I didn't add any peanuts as a condiment, though I added some leftover fresh basil for a nice finish. Sean suggested pouring the satay sauce over the chicken and vegetable mixture and the rice. This worked out well, since he only wanted a little sauce. More spicy, peanutty goodness for me!
The orange-scented jasmine rice is also really good, and it is something that could be used underneath other Asian style dishes. My advice is to buy a big bag of jasmine rice at an Asian grocery store, if that is available to you. Some large supermarkets will also stock some of these brands. They are just so much less money than "luxury import" brands, and they taste just as good, if not better. Having a Microplane takes all the work out of zesting citrus. I use this little tool all the time.
The end result for the satay was almost as delicious as the real thing, which is pretty hard to find in Thai restaurants, at least in Pittsburgh.The only place that I have been able to find a saucy, stir-fry style satay is at a little food truck near the Carnegie Mellon University campus. However, they are only open lunchtime hours, though they are usually open on afternoons during the weekend.
This recipe was already in my rotation (I like to make two or three familiar recipes every week, and then I try something new on the other days), but I think I will be making it more often, it was just so tasty!

Thursday, April 2, 2009

On Self-Denial


I have given up desserts for Lent, and I am really starting to miss my almost daily suagr fix. I may be exaggerating, but it's like my idea withdrawal from an addictive substance. However, I am allowing myself a treat on Sundays. Otherwise, I could never make it. To cope during the week, I have been eating blueberry Ego waffles (no syrup or even butter) when I am getting desperate. I kind of feel like the Ego approach is methadone for sugar addicts. I don't really want the waffle, but it keeps me under control. Who knows what would happen if I quit cold-turkey.

Another coping mechanism (or possibly form of torture) is thinking about the desserts I will eat when Lent is over. One part of this sugarless experience that I will take away a better appreciation for what's good. I now realize that I had fallen into the habit of eating junk without even thinking. There are some things that I just don't miss. I can assure you that, from now on, my sweet treat after a long day of work--which is when I need that deliciousness the most--will not include just any factory-made cake or cheap candy bar. There will be more baking in my future!

My list of things I miss the most:
1. Cupcakes from one of those fancy little shops (if you are in the Pittsburgh area, try here and here.
2. Homemade cupcakes!
3. Ice cream from Dave and Andy's(near the University of Pittsburgh). I am devoted to their Birthday Cake flavor.
4. Baklava, especially the baklava from The Istanbul Grille in Shadyside. This is now especially forbidden fruit, since these delicacies are made with pistachios.
5.Lake Champlain dark chocolate.
I could wax on and on about everything that I would like to eat (preferably not all at once, sounds painful), but I think that is enough. I'm off to make a delicious Chicken Satay Stir-Fry. Peanut butter, soy sauce, and chicken (along with a number of other things) are really tasty together!

Wednesday, April 1, 2009

Gilding the Pig


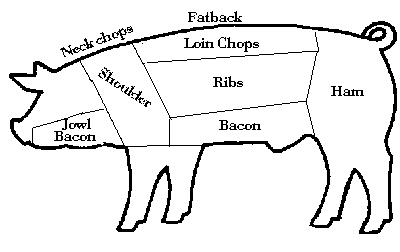
I found myself with a pork loin to cook for dinner this afternoon (actually, I put it in the freezer last week), but with no ideas for preparing it. I have been getting a little tired of this old stand-by, so I wanted to try a different recipe. Usually, I mix thyme, extra virgin olive oil, salt, pepper, and chopped fresh garlic together, apply to the meat, and roast. I decided on a variation today, using this recipe from Epicurious for inspiration.
Now, I don't have an herb garden available for use (yet), nor do I currently have to budget to stock many fresh herbs. I also didn't have any shallots. So, I improvised. I did away with the sauce, which cut out a step. However, if I had wanted, I could have made a gravy with the pan drippings from both the browning process and the roasting itself. But my boyfriend, Sean, doesn't like gravy, and I didn't feel like making any.
After I seasoned with salt and pepper and browned the meat in extra virgin olive oil, I basted the pork with a sauce made from Grey Poupon mustard, extra virgin olive oil, and a little white wine vinegar to thin out the mixture. I also added freshly chopped garlic and herbes de provence (a stand-by in many of my dishes--if you have never used it, I recommend that you give it a try, especially if you enjoy French/continential cooking).
I gave the sauce a little taste, and it was rather tart, in my opinion. Plus, Sean doesn't really like mustard (Sean's numerous dislikes are another common thread in my cooking), so I knew he would agree. So, I added a little honey. Looking back, it's not such a huge leap, but I felt like a crazed, inspired genius at this point. Clearly, I need to start taking more risks in life if honey is making me feel rebellious.
Back to the pork. I then basted this honey mustard mixture (see, not so creative) onto the pork, and put it in the oven. After about fifteen minutes, I added more, and after another fifteen, more. But this time, I also added a combination of herbes de provence and extra virgin olive oil on top of the mustard. I should also add that my pork loin was significantly smaller than the one called for in the original recipe, so I only needed to cook mine for about forty minutes in a 350 degree oven (the usual estimation for pork loin is thirty minutes per pound).
It came out well. While my changes to this recipe were by no means earth-shatteringly innovative, it makes for a similar, though much simpler, version of herb-roasted pork loin.